In order to take screenshot in windows 11, here are some ways you can use to do so-
- Using Print Screen button or Snipping Tool.
- By pressing Windows Key + G.
- Using Third-Party Applications.
Whether you want to capture the entire screen or just a specific part of it, we’ve compiled a list of the best ways to take a Windows screenshot.
The Print Screen Button
One of the simplest ways of capturing screen shot in windows 11 is to simply press Print Screen (PrtSc) button on your keyboard. This will be a shortcut for opening the dialog box for snipping tool.

You can then select the area of which you want to take the screen shot. After taking the screenshot it will be saved onto the clipboard and from there you can save it onto any supporting application like Microsoft Word or Paint
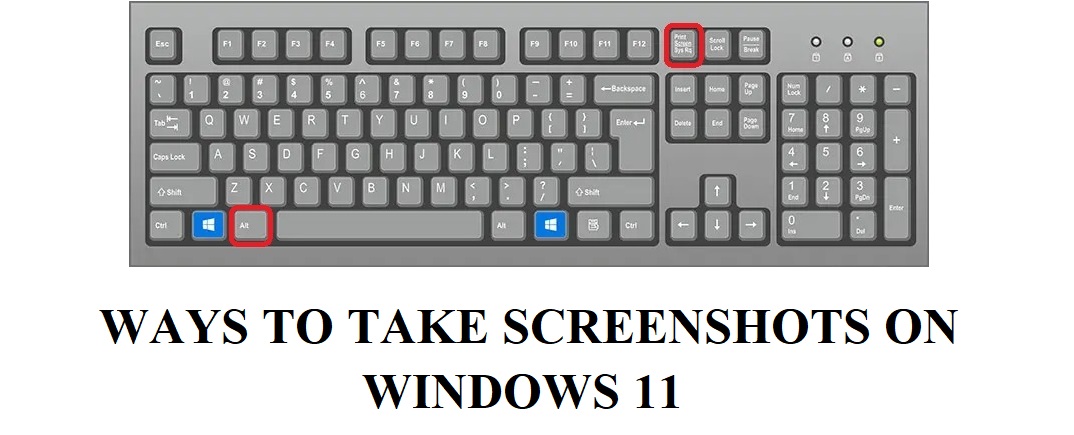
Alt +Print Screen
If you only want to capture the active window you’re working in, press Alt + PrtSc on your Windows 11 computer or Alt + Fn + Prtsc on your Winodws 11 laptop. This will capture a screenshot of the active window and copy it to your clipboard.

To save the screenshot, open a program that supports image insertion, such as Microsoft Word or Paint. Create a new document or image, and press Ctrl + V to paste the screenshot into the program. Then, you can save the file by clicking “Save” or pressing Ctrl + S.
Using Snipping Tool in Windows 11
In Windows 11 you can simply search for Snipping tool or you can press Windows Key + Shift + S.

After that your screen will go dim and a toolbar will appears on the top of the screen and you can take customized screenshots from there whether you want rectangular, free-form, full-window or a screen capture.

Once you’ve taken screenshot you can to your desired location on your computer or by default it will get save into the screenshot folder.

The Game Bar
The Game Bar is a handy overlay feature that allows you to take screenshots and record videos within most Windows apps and games. Follow the steps below to open and use it:
- Press the Windows key + G on your keyboard to open the Game Bar overlay.

2. In the overlay menu, click the Capture button – the camera icon – in the top menu to bring up the Capture menu.
3.In the Capture menu, click the camera icon to take a screenshot. You can also record a video clip by pressing the record button, with the option to include audio by clicking the microphone icon.
Screenshots and video clips captured by the Game Bar are automatically saved in PNG and MP4 format, respectively. You can find them in the Videos > Captures folder in File Explorer on your Windows 10 or Windows 11 computer.
Alternatively, you can access your captures through the Game Bar’s Gallery feature. To do so, click on the “Show my captures” button or press Windows key + G, then select “See my captures” underneath the screenshot and recording buttons in the Capture menu. From there, you can view, edit, and share your screenshots and video clips directly within the Game Bar.
The Third-Party Applications
In windows 11, you can also use third party apps to take screenshots on your device. Below is the list of third-party apps which you can use: